Advertisement

We need your help now

Support from readers like you keeps The Journal open.

You are visiting us because we have something you value. Independent, unbiased news that tells the truth. Advertising revenue goes some way to support our mission, but this year it has not been enough.

If you've seen value in our reporting, please contribute what you can, so we can continue to produce accurate and meaningful journalism. For everyone who needs it.
Shutterstock/kostrez

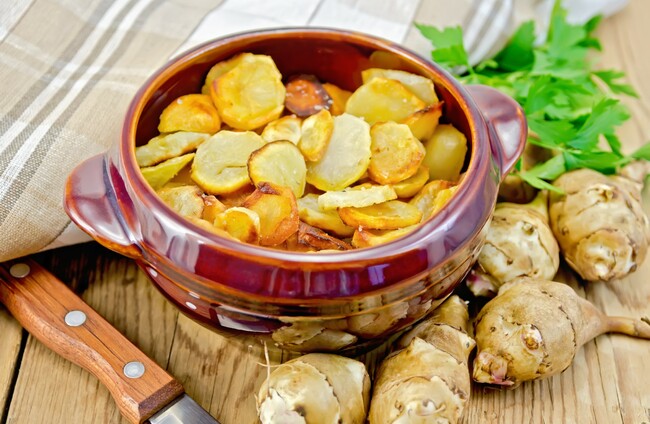
Jerusalem artichoke - the tasty, popular veg with a dark secret

Michael Kelly continues his Grow It Yourself series with Jerusalem artichoke, a veg that’s become increasingly popular in high-end restaurants.

WHEN I FIRST started growing, I was confused about the difference between Jerusalem and globe artichokes and wondered if it was just different names for the same vegetable. They are, in fact, very different plants that bear little if any resemblance to each other.

Jerusalem artichokes grow to over 3m tall and are grown to harvest their knobbly root. The globe artichoke is a more ornamental affair, grown for the flowering globe at the top of its stems, from which the much-coveted artichoke heart is gleaned.

The knobbly tubers of the Jerusalem artichoke are not to everyone’s liking, and they have an unfortunate association with flatulence (they’re often nicknamed ‘fartichokes’).

On the other hand, they are a cinch to grow, suffer no diseases, are exceptionally prolific and will grow pretty much in any soil, and make a great winter soup.

Like parsnips and potatoes, the Jerusalem artichoke is versatile, and can be roasted, sautéed, fried, mashed, boiled, steamed, pureed, battered and baked. It’s also full of iron, potassium, fibre and vitamin C.

As a result, the vegetables have become very popular recently in cafés and restaurants in the US and Australia.

We’re not far away from artichoke harvesting, so I suppose we could say that the windy season is almost upon us.

Jerusalem artichoke soup Shutterstock / Dani Vincek Shutterstock / Dani Vincek / Dani Vincek

Sowing

Sow the artichokes exactly as you would spuds.

Get yourself some artichoke tubers, make a hole about 15cm deep, and drop a tuber into it every 30cm in a row. Then backfill with soil. You will only need about five plants.

Don’t worry about including them in any rotation – they can be grown wherever you have space – but since they grow exceptionally tall, choose your site carefully as they will cast a shadow on their neighbours in the veggie patch.

Growing

Earth up the plants several times in the season to provide some support to the plant as it grows and also to increase yield. When they are 30cm tall, earth up to 15cm.

In the autumn, when the leaves go yellow, cut the stems right down to ground level and compost them.

Harvesting

You can start harvesting artichokes in October or November, but they will stay in the ground quite happily right through the winter.

You can remove them and store in a box of sand in a cold (but frost free), dark shed. They will last until April this way.

If they are left in the ground, they will eventually succumb to slugs, and they will probably prevent you from preparing the bed for whatever will be grown there next year.

Make sure to remove every last tuber from the soil. Otherwise, you will be plagued with them growing back next year.

Recommended Varieties

Fuseau and Gerard. The former is a good option for smooth tubers.

Problems

Try to make sure you only use the least knobbly tubers to grow from – the smoother the tubers you use to grow plants, the smoother the resulting crop will be. You will know why this is important when you go to peel them..!

GIY GIY

GIY Tips

  1. Divide large tubers before planting. Each one should be about the size of a golf ball.
  2. You can cut the plants down to 1.5m in late summer, which apparently focuses the plant’s energy on tuber production.

Recipe of the Week – Mellow Yellow Jerusalem Artichoke Pickle

In search of an artichoke pickle recipe, I came across this on the Gardener’s Table blog. Fermenting artichokes is rumoured to reduce their windiness. I can’t say I’ve ever done a detailed experiment on this, but did find this pickle delicious.

Ingredients:

  • 1½ pounds Jerusalem artichokes thoroughly scrubbed and cut into ½-inch dice
  • 1 teaspoon ground dried turmeric
  • 8 cloves garlic, chopped
  • 1 ½ tablespoons fresh ginger, minced
  • 1 teaspoon cumin seeds
  • 2 teaspoons salt
  • 2 teaspoons sugar
  • 1½ cups water

Directions:

Toss together the diced Jerusalem artichokes, the turmeric, the garlic, the ginger, and the cumin. Pack the mixture into a jar with a capacity of at least six cups.

Dissolve the salt and sugar in the water. Pour the brine over the Jerusalem artichokes; it will not cover them at first.

Add a brine bag (a gallon freezer-weight plastic bag containing 1 tablespoon salt dissolved in 3 cups water) or another suitable weight.

The next day the brine should cover the Jerusalem artichokes. If it doesn’t, add more brine mixed in the same proportions.

Wait several days before tasting the pickle. I found it perfect after a week: The brine was sour, and the Jerusalem artichokes pleasantly, mildly spicy and still crunchy.

When the pickle has fermented enough to suit your taste, store the jar in the refrigerator.

Michael Kelly is a freelance journalist, author and founder of GIY.

Click here for more tips on how to grow your own veg.

Readers like you are keeping these stories free for everyone...
A mix of advertising and supporting contributions helps keep paywalls away from valuable information like this article. Over 5,000 readers like you have already stepped up and support us with a monthly payment or a once-off donation.

Close
7 Comments
    Submit a report
    Please help us understand how this comment violates our community guidelines.
    Thank you for the feedback
    Your feedback has been sent to our team for review.
    JournalTv
    News in 60 seconds