Advertisement

We need your help now

Support from readers like you keeps The Journal open.

You are visiting us because we have something you value. Independent, unbiased news that tells the truth. Advertising revenue goes some way to support our mission, but this year it has not been enough.

If you've seen value in our reporting, please contribute what you can, so we can continue to produce accurate and meaningful journalism. For everyone who needs it.
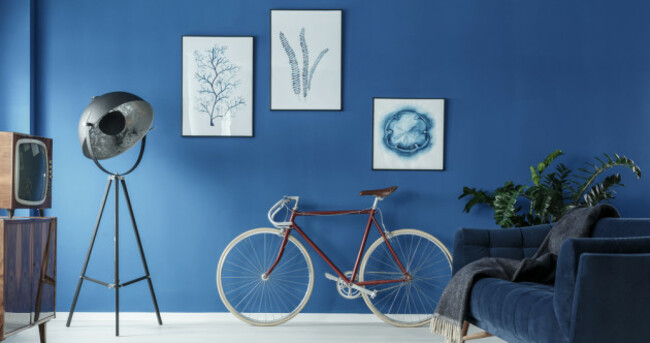
Shutterstock/Photographee.eu

Picture this: How to hang frames to make your rooms look more expensive

Two interior designers give their tips on hanging your pics in a way that’s tasteful rather than tacky. 

WHEN IT COMES to interior design challenges, wall decorations are some of the hardest to get right.

It’s the perfect storm, really: a literal wall showcasing who you are and what you’re into. Throw in a spirit level and the chance of ending up with a home full of unsightly holes and you’ll understand why so many of us approach them with trepidation.

No more. We’re showing you how to up your frame game with these tips from two interior design pros.

1. Go big or go home

If you try to hang a lot of small or mid-size frames, you’ll risk ending up with a busy, cluttered looking wall. Instead, aim to include one large piece to serve as an anchor.

Large prints or art pieces can be expensive, but interior designer Roisin Lafferty of Kingston Lafferty Design has a budget-friendly tip: head to a stock photo website. “We use Shutterstock a lot,” she says. “For example, if there’s anywhere you’ve traveled to that you really loved, you can buy a great shot pretty inexpensively, download it in high res and print it out as big as you like.”

Lisa Marconi, co-founder of design studio Dust, also likes to hit up Etsy for simple, abstract artworks that you can download and print in the size and shape that works for you. “It’s a really great way to get something big cheaply” she says.

2. Test drive your arrangements

Before you bring a hammer to a nail, play with different compositions by laying your frames out on the floor (some people also like to use masking tape to mark out the shapes on the wall). “You want to position things so that you’re visually led through the space, and the photos and art tell a story as you walk through,” advises Roisin.

Start with the largest piece, then mix and match the sizes and orientation of the others around it; ideally, you want vertical, horizontal and square pieces to create a balanced feel. Make sure to leave at least 2-3 inches of space between each frame.

3. Make family snaps look classy

There are a few things you can do to prevent family photos from looking too messy. “Firstly, try making sure all your family photos have mounts,” advises Lisa. “This instantly makes them look more high end. I also like to put snapshots in frames that are the same size and colour. So the pictures themselves can be different shapes and sizes, but the overall look will still be cohesive.” Try white or light wood frames for an intentional, pulled together feel.

Sticking to the same colour palette works for the photos themselves too – you can either go for pics that are the same tone, or turn quick iPhone shots into black and white ones using mobile filters.

4. Collect and curate

Walls aren’t about ticking some trend box – they’re a way of surrounding yourself with what you love, be that places you’ve been, beloved family members or colours and patterns you find inspiring.

So instead of just pictures, aim to hang a mix of elements. “Adding different textures takes things to a whole new level,” says Lisa. “You might try adding a little neon sign or a cool plate.” Other ideas include picking up a vintage painting or quirky map in a second-hand shop, a fun abstract print, a quote you love or even a framed kid’s sketch.

Be prepared to be patient when building your collection – it won’t all instantly go together, so don’t be tempted to just add things as you go or you’ll end up with a half-hearted, chaotic arrangement.

5. Try this smart shelf hack

Picture ledges can act as ‘training wheels’ for gallery wall newbies, letting you play with scale and shape without putting too many holes in your wall (the ones from Ikea are a popular option). For a high-end finish, Roisin recommends painting your ledge the same colour as your wall. “That way, they look almost invisible,” she explains.

Picture ledges are also a great way of displaying an eclectic mix of things – from books and postcards to record covers and even small plants.

6. Dare to DIY

Some basic DIY tools and a tester pot of paint are all you need to bring attention to a single standout piece. “You can use FrogTape, a spirit level and some measuring tape to paint a much larger square on the wall behind a small piece,” Roisin explains. “It’s great for drawing the eye, and you can go as bold or subtle as you want.”

7. Pop your colour

Another way to create impact is by painting the entire wall. “Having a dark wall immediately makes a statement and helps smaller pieces pop,” says Lisa. A colourful background means you can do fun things like have photos “floating” in glass without mounts, or play with complimentary tones by say, framing a patterned wallpaper sample.
Speaking of mounts, Lisa loves to experiment with these too: “Instead always going for white or cream, try a black or dark mount, or go for something fun and colourful,” she recommends.

8. Last but not least, avoid this no-no

“My absolute pet peeve is when when a piece is hung too high” says Roisin. “Pictures and art are there to be appreciated, so they should be at eye level.”

If you’re hanging frames near furniture, it’s important that the two work well together in the space. “You can’t just plunk it on the wall,” laughs Lisa. “You’ll end up with pieces floating somewhere near the ceiling. A good rule of thumb is to allow around 1.3 metres between the top of the furniture and the bottom of the frame.”

More: 11 design features that could be dating your home – and what to do about them>

Close
Comments
This is YOUR comments community. Stay civil, stay constructive, stay on topic. Please familiarise yourself with our comments policy here before taking part.
Leave a Comment
    Submit a report
    Please help us understand how this comment violates our community guidelines.
    Thank you for the feedback
    Your feedback has been sent to our team for review.

    Leave a commentcancel