Advertisement

We need your help now

Support from readers like you keeps The Journal open.

You are visiting us because we have something you value. Independent, unbiased news that tells the truth. Advertising revenue goes some way to support our mission, but this year it has not been enough.

If you've seen value in our reporting, please contribute what you can, so we can continue to produce accurate and meaningful journalism. For everyone who needs it.

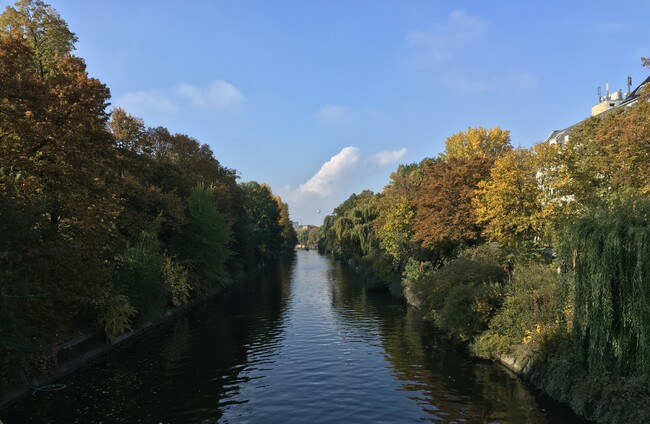
One photo taken with HDR.

Want an easy way to improve your outdoor photos? HDR can help

In certain situations, it can solve the brightness problem that outdoor photos can suffer from.

IF YOU REGULARLY take photos of the countryside or objects, you might have spent a bit of time adjusting focus and brightness in an (sometimes vain) effort to get it right.

If that’s the case, then HDR (High Dynamic Range) could solve that problem. It’s best suited for high-contrast scenes, where there is a wide range of brightness.

While smartphone cameras have come in leaps and bounds since the first iPhone in 2007, they still have trouble capturing every detail in front of it. Exposure can cause the sky to appear as too bright (white with no detail), or the ground will look too dark.

Tapping on the subject will readjust the focus but for those shooting in auto, this will only solve part of the problem.

HDR solves this problem by stitching together different photos of the same scene taken at different exposures – usually one over-exposed, one under-exposed and one at normal exposure –  and created a more balanced photo.

While you can just turn it on automatically, HDR works in a few situations. The best time to use it is for landscape photos where capturing a large area where the contrast between a bright sky and dark ground is apparent.

Compare the two photos below. The first one is a little too bright in the sky – you can barely make out the clouds – while the trees are rather dark.

IMG_2936 Normal photo

Compare that with the HDR version and you can see a difference. The photo is brighter, but it’s also more detailed.

IMG_2937 Photo using HDR.

Here is another example. This photo is overexposed and a lot of the detail in the foreground is lost.

IMG_2933 Normal photo

Compare that to the HDR version and there’s an improvement. Certain parts like the building on the left-hand side are darker, but you can make out more details.

It doesn’t solve all of the image’s problems. The person standing in the foreground is still dark. If a scene or subject is too dark, it’s not going to make much of a difference.

IMG_2934

While it’s useful, it has its limitations. Since it combines images, it’s best for photos where everything is still. If it captures anything moving, it will end up looking blurred.

HDR is a handy tool to have, but luckily, most smartphones give you the option to capture two photos: one as normal and one with HDR turned on. That way, you can compare the two photos and see which one is the best.

Like all things, the best thing to do is to experiment with both formats. It’s a tool that has its uses, but only practice will help you spot the right moments for it.

Read: We put these four top smartphone cameras to the test. Here’s how it went >

Read: If you’re not using burst mode on your camera, you’re missing a trick >

Readers like you are keeping these stories free for everyone...
A mix of advertising and supporting contributions helps keep paywalls away from valuable information like this article. Over 5,000 readers like you have already stepped up and support us with a monthly payment or a once-off donation.

Close
JournalTv
News in 60 seconds