Advertisement

We need your help now

Support from readers like you keeps The Journal open.

You are visiting us because we have something you value. Independent, unbiased news that tells the truth. Advertising revenue goes some way to support our mission, but this year it has not been enough.

If you've seen value in our reporting, please contribute what you can, so we can continue to produce accurate and meaningful journalism. For everyone who needs it.

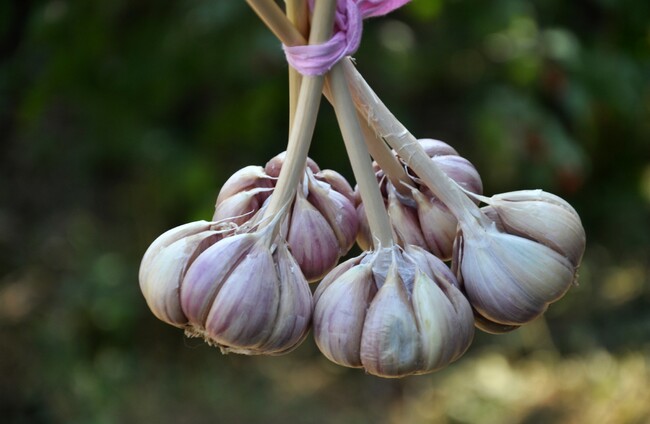
It's time to think about next year's garlic crop. Shutterstock/Orest lyzhechka

From the Garden Sow your garlic before Halloween to ensure a plentiful crop by next June

Although traditionally sown in December, putting the garlic in the ground now gives it the best chance of thriving in cold weather.

EVEN THOUGH WE have only used a small amount of this year’s garlic crop so far (with the rest hanging up in the corner of the kitchen), this week it was time to plant next year’s crop.

Though the tradition is that garlic is sown before the shortest day of the year in December and harvested by the longest day in June, getting them in to the ground earlier than that gives them the best chance of getting the cold weather they need to thrive. 

Though sowing garlic is easy (see below), it generally requires some bed clearing and a bit of forward thinking about next year. In particular, I have to consult my gardening diary – although it’s a nonsense to call it a diary really, for it is only used once a year to consult the crop rotation I follow to see where things should be grown each year. 

So, for 2020, the onion family (garlic, leeks, onions) will be going where the brassicas (cabbages and mustard plants) are this year, alongside the small tunnel at the back of the veg patch. 

Some clearing was required first to get a bed ready – some past their best radishes and kohlrabi and a mat of chickweed. The radishes and kohlrabi had gone too far to eat them fresh, so they will be pickled instead to try and salvage them, which usually works (see recipe below).

Once the bed was cleared, sowing the garlic only takes a few minutes, with our eldest child tasked with measuring out the rows and placing the cloves on the ground.

I sowed around 100 cloves in total, which is probably way too many, but I am allowing for some of them not to grow and others to be on the small side. Around 50-60 decent bulbs would be a great result. 

There are still some other brassicas growing in this area of course – which need to stay put for now.

I invested in a decent bionet cover earlier this year which has been brilliant – earlier in the year to keep the cabbage white butterfly away, and later in the year to keep hungry pigeons at bay.

So things are looking healthy here. The Brussels sprouts are starting to produce little buds and purple sprouting broccoli plants that won’t be ready to eat until next spring.

The Basics – Sowing Garlic

Most GIYers sow garlic in early winter (October – December, but before the shortest day of the year – 21 December) as the bulbs benefit from a cold snap. Some varieties however can be sown in spring but they won’t grow as big. 

Pick a sunny site, with good fertile, free-draining soil. Apply an organic fertiliser (seaweed dust and poultry manure pellets) or add a thin layer of compost after sowing. Sow each clove so that the tip is about an inch below the surface.

Space them about 10-15cm apart in the row, in rows 30cm apart. If your soil is very wet, sow the cloves in module trays instead and transplant them when sprouted. 

As with onions, garlic hates weed competition so keep the bed weed free. Hoe carefully around the bulbs every week or so. Water occasionally in dry weather but don’t over-water. 

Recipe of the Week – Pickled Radishes 

Pickled radishes are great in sandwiches and salads. I like to pretend that we’re making a batch for storage for the winter, but they never last that long. Unopened, it should last for three to four months in the fridge but once you open the jar use up within a few weeks.

Ingredients 

  • 1 bunch radishes
  • 130ml apple cider vinegar
  • 130ml water
  • 2 tbs honey
  • 2 tsp salt
  • 1 red chilli pepper, finely chopped
  • 1 clove garlic, sliced
  • ½ tsp mustard seeds

Directions

Wash the radishes well and remove the leaves and stems.

Slice the radishes thinly with a mandolin and pack them in to a sterilised Kilner jar with the garlic and chilli-pepper. 

Heat the vinegar, water, honey, spices and salt in a saucepan until boiling then pour over the radishes.

Close up the jar and allow to cool.

Allow the radishes to pickle for at least five days before eating.

Michael Kelly is an author, broadcaster and founder of GIY.

image

Readers like you are keeping these stories free for everyone...
A mix of advertising and supporting contributions helps keep paywalls away from valuable information like this article. Over 5,000 readers like you have already stepped up and support us with a monthly payment or a once-off donation.

Author
Michael Kelly
View 3 comments
Close
3 Comments
This is YOUR comments community. Stay civil, stay constructive, stay on topic. Please familiarise yourself with our comments policy here before taking part.
Leave a Comment
    Submit a report
    Please help us understand how this comment violates our community guidelines.
    Thank you for the feedback
    Your feedback has been sent to our team for review.

    Leave a commentcancel

     
    JournalTv
    News in 60 seconds