Advertisement

We need your help now

Support from readers like you keeps The Journal open.

You are visiting us because we have something you value. Independent, unbiased news that tells the truth. Advertising revenue goes some way to support our mission, but this year it has not been enough.

If you've seen value in our reporting, please contribute what you can, so we can continue to produce accurate and meaningful journalism. For everyone who needs it.
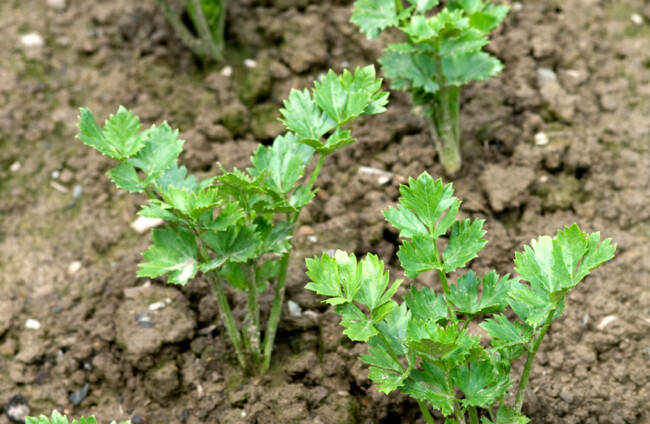
From the Garden What is the difference between celery and celeriac?

Time to transplant those tomatoes too. ‘Did you know that the little fuzzy hairs on the stem of a tomato seedling can become a root if planted under the soil?’

ALTHOUGH THEY ARE from the same family and have similar flavours, celery and celeriac are very different vegetables.

Celeriac is sometimes called celery root which makes sense because it is cultivated for its knobbly root rather than the stem.

It is a brilliant veg to grow, which can sit in the ground right through the winter months and used as needed. I find it pretty amazing that as my thoughts turn to sowing this year’s crop, we are still eating celeriac from the garden which was sown this time last year.

Celery, on the other hand, is a more perishable veg that needs to be eaten once it’s ready.

Celery and celeriac are sown in a similar way to tomatoes – that is, the seed is sprinkled in a 9cm pot, from where the little seedlings are later planted out in to module trays.

This is because both these vegetables have a very long germination period, of up to three weeks.

If you sow them direct in modules, the potting compost in the module trays will be depleted of nutrients after 4-6 weeks (more than half of that time is spent just waiting for it to germinate) – this will cause a growth check.

When you prick them out of the pot in to module trays about 4-5 weeks after sowing, you are giving them good fresh potting compost in which to grow for the following month or so.

Because the seeds of these vegetables are so tiny, it’s a good idea to sieve the soil into the pot before sowing.

Bang down the pot a few times on the bench to get the compost to settle down.

Overfill the pot again and slice off the excess with a piece of wood or a ruler to get a level surface. I water the pot before sowing, again because the seeds are so small, they could wash away if you water afterwards!

Celery and celeriac seeds both need light to germinate, so simply sprinkle the tiny seeds on top of the potting compost – don’t cover with compost.

To keep the compost moist, I cover the pot with a freezer bag and check it regularly to make sure it doesn’t dry out.

At this time of the year, it’s a good idea to keep this on a warm windowsill or on a heated propagation mat or bench.

The Basics: Transplanting Tomatoes

Unlike say carrots or parsnips, tomatoes don’t mind a little handling at the seedling stage – moving them on to bigger pots or module trays shouldn’t harm them.

Did you know that the little fuzzy hairs on the stem of a tomato seedling can become a root if planted under the soil?

Burying the seedlings a little deeper than normal will help to develop a larger, deeper root system and therefore healthier, sturdier plants.

When transplanting tomatoes, water them well the day before.

This makes them easier to remove the next day. If they are coming out of module trays, just pop the little plug plant out of the module.

If they are coming from a pot or tray, hold the leaf of the seedling carefully and use a plant label to ease it out of the soil, bringing as much root with it as possible.

Make a hole in the compost in the new pot or module tray and pop the little seedling in carefully. Firm it in gently.

If your seedlings are a bit leggy you can remedy this by burying up to 2/3 of the plant including the lower sets of leaves.

Recipe of the Week: Sicilian Style Purple Sprouting Broccoli

For the season that’s in it, we’re continuing our series of sprouting broccoli recipes with a Sicilian style dish that’s full of flavour.

Ingredients:

  •  1kg sprouting broccoli
  •  6 anchovy fillets (drained – retain the oil)
  •  2 tablespoons olive oil
  •  1 onion
  •  12 black olives
  •  125ml stock (chicken or veg)
  •  125ml red wine
  •  1 tsp butter
  •  1 tsp flour

Heat the oil and simmer the onions, anchovies and olives for 5 mins. Add the broccoli and give it a good stir.

Add the stock and the wine and then stir in a tablespoon of the anchovy oil. Season. Cover and cook for about 10-15 mins. When the broccoli is tender, remove the lid and simmer for another few minutes.

Take out the broccoli and transfer to a warmed serving dish. Thicken the sauce by adding a roux made from the butter and flour. Stir the sauce until it boils and then pour over the broccoli.

Serve with crusty bread, fried potatoes or rice.

Michael Kelly is an author, broadcaster and founder of GIY.

© GIY Ireland 2019 – all rights reserved.

Readers like you are keeping these stories free for everyone...
A mix of advertising and supporting contributions helps keep paywalls away from valuable information like this article. Over 5,000 readers like you have already stepped up and support us with a monthly payment or a once-off donation.

Author
Michael Kelly
View 7 comments
Close
7 Comments
This is YOUR comments community. Stay civil, stay constructive, stay on topic. Please familiarise yourself with our comments policy here before taking part.
Leave a Comment
    Submit a report
    Please help us understand how this comment violates our community guidelines.
    Thank you for the feedback
    Your feedback has been sent to our team for review.

    Leave a commentcancel

     
    JournalTv
    News in 60 seconds