Advertisement

We need your help now

Support from readers like you keeps The Journal open.

You are visiting us because we have something you value. Independent, unbiased news that tells the truth. Advertising revenue goes some way to support our mission, but this year it has not been enough.

If you've seen value in our reporting, please contribute what you can, so we can continue to produce accurate and meaningful journalism. For everyone who needs it.

Shutterstock/casanisa

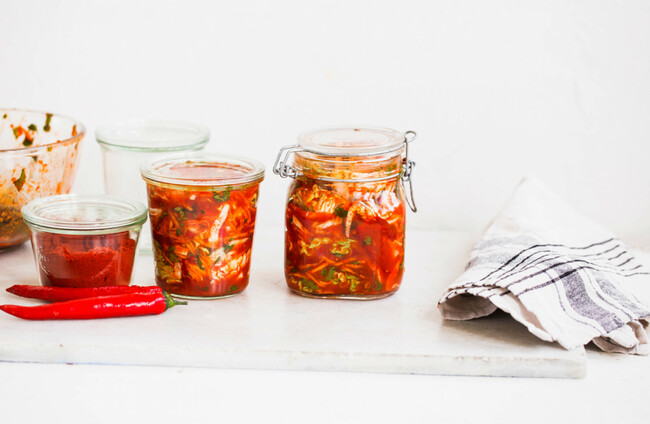
From the garden How to make your own tangy kimchi at home

Here’s how to make sure you always have some homemade healthy kimchi to hand.

IT HAPPENS EVERY year around this time, but still it catches me by surprise. It’s the switch in focus from the current growing year to the following one, and it’s always prompted by garlic.

Garlic is unusual in that unlike most veg that are sown in spring and harvested in summer/autumn, it sort of straddles two growing years.

It is best sown around this time of the year (or at least by the shortest day of the year in December) so that it has the cold spell it needs in the soil (around five weeks at less than five degrees) for the cloves to split and turn into a bulb ready for harvesting next June. I always like to get it sown in October so it has some time in relatively mild conditions to get established before the dormancy of winter.

So with that in mind, this week my thoughts turned to getting a bed ready for planting the cloves, and of course that forces you to think about where you are going to grow garlic for next year, and to revisit the crop rotation plan.

Crop rotation is a fairly simple concept – you basically group the main veg into families and each year you grow the different families in different parts of your veg patch.

It is the cornerstone of organic growing (and the main difference between organic and conventional growing) since it means that you are staying ahead of pests and soil diseases and don’t need to use chemicals to control them.

I have a garden diary on a shelf at home, which was given to me as a Christmas present years ago. I presume the idea behind the gift was that it would turn me into a Victorian gardener, meticulously recording my every garden-related task, achievement or thought.

In reality, I take it out just once a year to make one paltry entry in it, a hastily drawn map of the veg patch outlining where each of the veg families are to be grown in that year.

Rotation

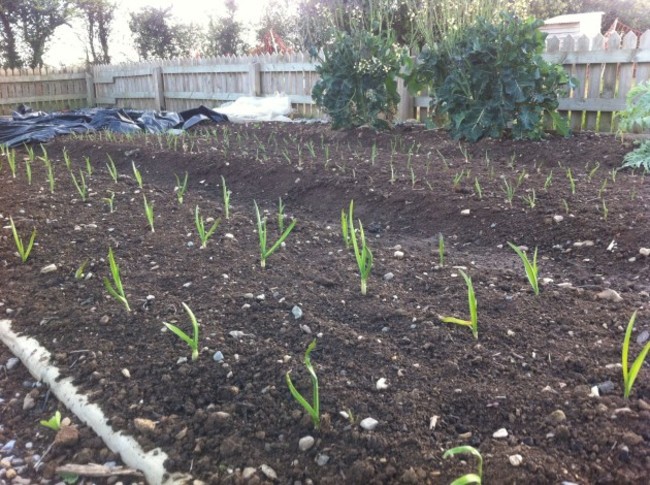
garlic seedlings MIchael Kelly MIchael Kelly

I’ve written before about how I use a five-year rotation that divides veg into five main families – that is, potatoes, legumes (peas and beans), brassicas (cabbages, sprouts, broccoli etc), onions (garlic, leeks, onions) and roots (carrots, beets, parsnips etc).

To remember the families I use the mnemonic ‘People Love Bunches of Roses” with the P in People standing for potatoes and so on. Each year then I take out the diary (blowing off the dust), sketch an outline of the veg garden and move everything around one space, so that for example the brassica family moves to the next area and won’t be back in the same spot for six years.

With that little exercise done and the diary returned to its splendid isolation on the shelf, I know where the garlic is to be sown for the year ahead. See what I mean? We are already taking the first steps to gently consigning 2018’s growing year to history and moving on to another year of adventures.

The basics – sowing garlic

Pick a sunny site, with good fertile, free-draining soil.  Garlic won’t do well if it’s sitting in sodden soil for the winter.

Apply an organic fertiliser before sowing – seaweed dust or poultry manure pellets would work. I often put a shallow layer of compost from the heap on top of the soil after planting the garlic.

Sow each clove so that the tip is about 1cm below the surface. They should be spaced 15cm apart, in rows 30cm apart.  If your soil is very wet, sow in module trays and transplant when sprouted. 

Though all garlic is basically the same, you are best to buy garlic that is certified disease free for planting – the main concern is that you could import onion white rot in to your soil which can take 15 years to eliminate.

Buy from a good garden centre or online retailers like Fruithill Farm or Quickcrop (or from us in GROW HQ if you are in Waterford). If you are stuck and have to use supermarket garlic, use good quality (preferably organic) European garlic and sow in pots instead of in the soil.

How much to grow? That depends on how much garlic you need, and how much space you have. So here’s the maths bit.

Garlic will store in a braid until roughly March or April of next year, so each year I am aiming to grow around nine months worth of garlic (August-April).

Using one bulb a week that means we would need 36 bulbs. In a standard veg bed of 1m wide you will fit three rows of garlic (with the rows spaced 30cm apart) and with the cloves planted at 15cm apart in the row you will get 21 bulbs of garlic per metre length of bed. So to get my supply of 36 bulbs I will need to dedicate around 2m of bed to the cause.

Watch the episode on garlic from our RTE TV series GROW COOK EAT on our You Tube channel at youtube.com/giyireland.

Recipe of the Week – Kimchi

This recipe is inspired by our Head Chef’ JB’s fermentation and pickling course which took place this week at HQ.

Though it’s traditional to have coarsely grated cabbage in kimchi, I like the veg to be finely grated. This recipe produces enough for two large kilner jars, but a lot will depend on the size of the head of cabbage.

Ingredients

  • 1 medium head white cabbage, grated
  • 2 medium carrots, grated
  • 1 small beetroot, peeled and grated
  • 3 shallots , chopped
  • 2 red chillies deseeded and finely chopped
  • Thumb-sized piece ginger, chopped
  • 2 tbs fish sauce 
  • 750ml water and 3 tbs sea salt

Directions

Make the brine by adding the salt to the water and stirring. Put the cabbage, beetroot and carrot in a large bowl and add the brine.

Put a plate on top to keep the veg submerged and leave 3-4 hours or overnight. Drain the veg the next morning, retaining the brine.

Put the shallots, chillies, ginger and fish sauce and blitz with a hand-blender until it’s like a paste. Pour over the veg and mix really well to ensure all the veg is coated in the paste.

Put the veg mix into sterilised kilner jars and pour the brine over so it’s covering the veg.

Cover and leave to stand at room temperature for 3-5 days. It will start to bubble and ferment. Then pop it in the fridge where it will continue to ferment (but more slowly).

You can enjoy it straight away and it will keep for about a month (though it never lasts that long in our house).

Readers like you are keeping these stories free for everyone...
A mix of advertising and supporting contributions helps keep paywalls away from valuable information like this article. Over 5,000 readers like you have already stepped up and support us with a monthly payment or a once-off donation.

Close
3 Comments
This is YOUR comments community. Stay civil, stay constructive, stay on topic. Please familiarise yourself with our comments policy here before taking part.
Leave a Comment
    Submit a report
    Please help us understand how this comment violates our community guidelines.
    Thank you for the feedback
    Your feedback has been sent to our team for review.

    Leave a commentcancel

     
    JournalTv
    News in 60 seconds