Advertisement

We need your help now

Support from readers like you keeps The Journal open.

You are visiting us because we have something you value. Independent, unbiased news that tells the truth. Advertising revenue goes some way to support our mission, but this year it has not been enough.

If you've seen value in our reporting, please contribute what you can, so we can continue to produce accurate and meaningful journalism. For everyone who needs it.

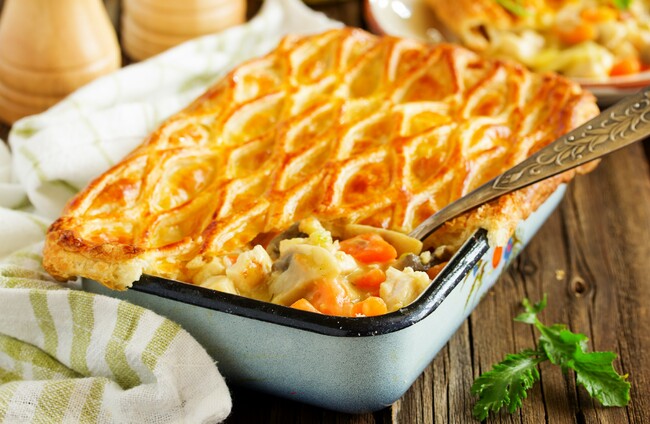
Why not make a pie with Christmas dinner leftovers? Shutterstock/Lesya Dolyuk

From the Garden Growing tired of leftover turkey? Put it in a pie

It’s time to start thinking about next year’s garden as 2020 creeps ever-closer.

AS WE START to think about growing in 2020, I’m intrigued by the idea that 2019’s gardening is still paying dividends.

It’s a good time of the year for a bit of stock-take. I use various locations to store vegetables around the house and garden – our kitchen doubles up as a larder at this time of the year.

You can barely get into the kitchen at this point, to be perfectly honest. There are veggies hanging out of every available space, along with the garage where I keep vegetables in sacks, boxes and the freezer.

Finally, there are also vegetables still in the ground in the veg patch and polytunnel.

Although my onions are gone already, we still have about 30 bulbs of garlic hanging up in a braid and about 20 squashes and pumpkins on top of the dresser in the kitchen.

On a shelf in the utility room, we have various chutneys, pickles, krauts, marmalades and piccalilli (South Asian pickles) made from gluts of this year’s produce – cucumbers, onions, cauliflowers, cabbage, beetroot, chillis, courgettes, pears and more.

The pickled pears are particularly prized, and get cracked out over Christmas as part of starters and desserts, while the pickled chilli-peppers have been a godsend for adding to pizzas on Friday nights.

In the garage, we have a chest freezer, the penultimate resting place to last year’s tomatoes, broad beans, peas, runner beans, celery and whole chilli-peppers.

Every year, I hope the tomato sauces in particular will last until the new season tomatoes arrive in July (using roughly one tub of sauce a week).

Unfortunately, every year so far I’ve come up short – it’s this which has fed my alarming obsession with growing more and more tomato plants (up to about 80 plants this year, yikes).

In boxes and sacks in the garage I also have loads of beetroot and carrots.

The vegetables left in the ground outside now are parsnips, carrots, leeks, kale, purple sprouting broccoli, Brussels sprouts and celeriac.

We work away on the celeriac, leeks, parsnips and carrots as we need them. The sprouting broccoli will start to come hopefully in February and March.

The polytunnel is still churning out green leaves – courtesy of a late sowing in October. We’ve a marvelous supply of mizuna and mibuna (Japanese greens), red mustard and radishes.

I also have some fresh beetroot in the big tunnel from a late October sowing.

All in all, though there’s a sense that the larder is depleting, it’s not exactly empty yet.

Will we make it through to April or May when we get our first crops from this year’s sowing? Possibly not, but we will be damn close!

The Basics – Get your head around the ideal veg bed width

The ideal bed width is 42-inches with a 32-inch permanent path.

The bed can be as long as space allows – for example you could have a bed that’s 50ft long, as long as it’s 42-inches wide.

You will be able to get at all parts of the bed without standing on it if you stick to these measurements.

Don’t ever step on your veg beds. Walking on beds compacts the soil and impacts fertility.

This bed width also suits the spacing for most vegetables -  you will get three rows of potatoes in a bed this width and five rows of lettuce.

The path is just wide enough to take a wheelbarrow and allow you to kneel comfortably, but it’s narrow enough that you are not wasting valuable ground.

You can leave the paths as bare soil if you want – it will need to be hoed regularly to prevent a buildup of weeds, but on the plus side you can access soil in the path if you need it for earthing up in the bed.

Alternatively, you could put in a more permanent (weed-free) path with mypex and pea gravel or bark mulch.

Recipe of the Week – Leftover Turkey Pie

It just wouldn’t be Christmas without this amazing Turkey and Leek Pie recipe from Jamie Oliver.

Ingredients

  • 2 rashers of smoked streaky bacon, roughly chopped 
  • ½ bunch of fresh thyme, leaves picked 
  • 2 kg leeks, washed, trimmed and finely sliced 
  • 800g cooked white turkey meat, torn into big chunks 
  • 2 heaped tablespoons plain flour 
  • 2 pints turkey, chicken or vegetable stock 
  • 2 tablespoons of crème fraîche 
  • 1 x 500g packet puff pastry 
  • 2 sprigs fresh sage, leaves picked 
  • 1 egg, beaten for the topping 
  • 50g fresh coarse breadcrumbs 
  • 5 tbsp Parmesan, coarsely grated 
  • A handful of flaked almonds 
  • 1 tbsp olive oil

Directions

Preheat your oven to 190 degrees Celcius.

Fry the bacon in a large pan on a medium heat in a glug of oil, a knob of butter and some thyme leaves.

When the bacon has browned, add your leeks and fry them off for about three minutes so they are well-coated in the butter.

Add a pinch of salt and pepper then pop the lid on, turn the heat down to medium and let them cook for 30 minutes, stirring every five to 10 minutes to make sure they don’t stick.

Add the turkey meat and stir.

Add the flour, mix it in well then pour in your stock and stir again.

Add the crème fraîche then turn the heat up and bring everything back up to the boil.

Pour the mixture through a sieve over another large empty pan and let the wonderful gravy from the mixture drip into the pan while you roll out your pastry.

Get a deep baking dish roughly 22 x 30cm.

Dust a clean surface and a rolling pin with a bit of flour and roll your pastry out so it’s about the size of your dish.

Spoon the leek mixture from your sieve into the pie dish and spread it out evenly.

Lay your pastry on top, tuck the ends under then gently score the pastry diagonally with your knife.

Add a pinch of salt to your beaten egg then paint this egg wash over the top of your pastry.

Pop your pie in the oven for about 35 to 40 minutes or until the pastry is puffed up and golden brown.

When the pie is ready, reheat the lovely gravy and serve with your pie, along with some peas. 

Michael Kelly is an author, broadcaster and founder of GIY.

VOICES LOGO

Readers like you are keeping these stories free for everyone...
A mix of advertising and supporting contributions helps keep paywalls away from valuable information like this article. Over 5,000 readers like you have already stepped up and support us with a monthly payment or a once-off donation.

Close
8 Comments
This is YOUR comments community. Stay civil, stay constructive, stay on topic. Please familiarise yourself with our comments policy here before taking part.
Leave a Comment
    Submit a report
    Please help us understand how this comment violates our community guidelines.
    Thank you for the feedback
    Your feedback has been sent to our team for review.

    Leave a commentcancel

     
    JournalTv
    News in 60 seconds